.png)
OERMicroscope UnityRepo
The Unity project of Phase 2 of the OTC funded OER Microscope.
Developed using Unity version 2020.3.27f1 Funded by Department of Education OTC Grant.
Phase 1 web version: https://opennj.net/AA00001513/00001
Phase 2 download version: https://opennj.net/AA00001561/00001
Updated source code and version is also available at developer Eric Guadara's itch page: https://eeease.itch.io
How to Use:
Downloading and Installing:
The OER Microscope HD is currently available for Mac and Windows.
It is hosted at the following website: https://eeease.itch.io/oer-microscope-hd
Scroll down on the webpage to find the two download buttons. The first is for Mac (see the apple icon next to it). The second link is for Windows.
Install Instructions:
- Download the appropriate app (Windows or Mac).
- Unzip the folder:
- On Mac, double click the folder to unzip.
- On Windows, right click and choose Extract All to unzip.
Windows Extract:
Running the Microscope:
Double click the application icon (it should be of type "Application", not folder or dll or anything else). - If you get a security popup, try bypassing it: - On Mac, right-click the application and choose Open. - On Windows, there's usually a More Info button near the bottom of the popup that allows you to "Run Anyway."
Double-click application to open:
If the application doesn't launch at all, try disabling your Antivirus software (Avast, Norton, etc).
Built-in and Custom Slide Loading
Built-in Slides:
The OER Microscope HD comes pre-loaded with nearly 100 slides, each with different magnifications.
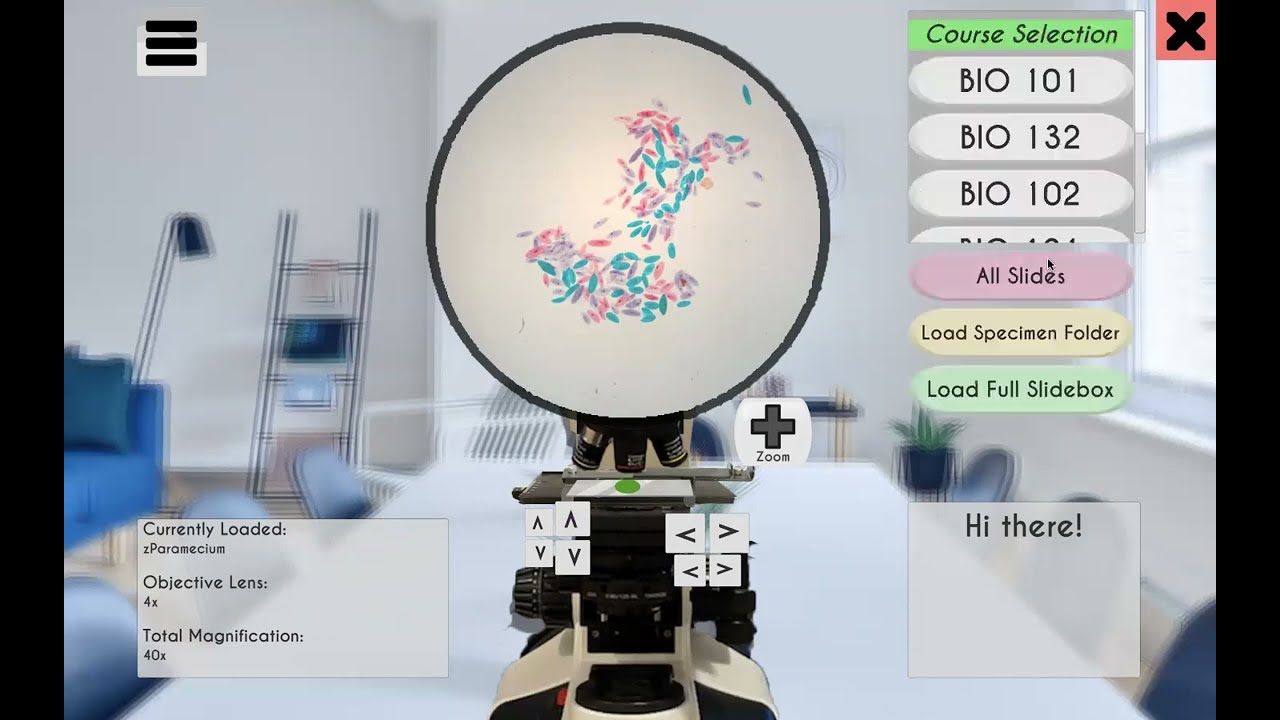
The slides are organized by course (BIO 101, BIO 132, etc).
If you're looking for a specific specimen, try clicking All Slides, then using the search bar to type in your specimen:
All Slides > Search Bar:
Click on any slide to load it.
Once a slide is loaded, the large up/down arrows act as Coarse Adjustment. The small up/down arrows are Fine Adjustment. The left and right arrows are the Mechanical Stage Control, either X or Y axis. Clicking the Lens will rotate Objective Lenses from 4x to 40x (some specimens have 100x).
These controls can be found in the Options menu (top-left) > Highlight Help:
Options > Highlight Help:
Custom Slides:
The OER Microscope HD supports custom slides. Here's a video describing how to prepare and load a folder of images: Video Tutorial:
Preparing a folder of slides for distribution can be tricky. We used an iPhone attachment to capture all of the HD photos found in the program.
If you have the images, you should: 0. Get them onto a computer.
- Place them all in a folder.
- Place the folder somewhere you can find it (ex. Documents or Desktop).
- Make sure they're named alphabetically in the order you want them to be loaded.
- ex. A folder with the following images in it: acidFast4.jpg, acidFast10.jpg, acidFast40.jpg.
- When this folder is loaded, acidFast4 will be the first image (Objective Lens 4x).
- Click Load Specimen Folder and navigate to the prepared slide folder on your computer.
Example folder with slide images:
Important things to note about custom slides:
- Each folder should be one specimen.
- The specimen folder needs to be on the same computer as the Microscope Application.
- The app does not support loading slides from The Cloud, Blackboard, Drive, etc.
- The specimen folder needs to be UNZIPPED.
- If you are distributing a folder of images to students, it will probably get zipped when they download it. The folder needs to be completely unzipped in order to work with the Microscope.
FAQs:
- Do I need a Github account to use this Microscope?
- No. Once downloaded, you can even use the Microscope without an internet connection.
- The Microscope won't open! Help!
- Make sure the folder is completely unzipped. On Windows, if you double-click a zipped folder, it lets you 'preview' the contents. This is tricky because it seems unzipped and usable when it is not.
- How do I turn off the music? - Options > Music will turn off the music.
- How do I distribute slides to students? - It's a multistep process. Get slide images, place them in a folder, upload that folder, then have students download that folder on their own computers. - The big sticking point here is making sure students understand how to download your slide folders and unzip them. I would go through this process in class if possible and maybe even record a video of your own. Feel free to link to my video, too! I may record a couple of videos to go through the process of creating a slides folder and downloading a slides folder.
- Can students use custom slides on their phones?
- No. Because we wanted to bundle it with ~100 HD slides, the HD Microscope is only available for Mac and Windows. Also, custom slide functionality for two more Operating Systems (iOS, Android) was out of scope during our development cycle.